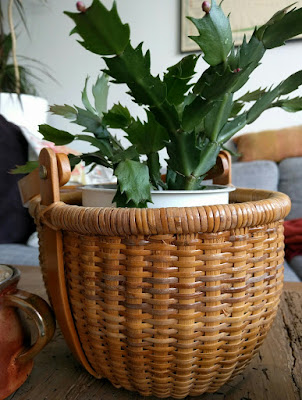
How will you provide drainage for the plant and prevent leakage? In my case the solution is through the reuse of plastic containers - one with holes added and one without holes. Read on to see more.
I had found a discarded basket quite some time ago, it came from a chain store and was probably filled with overpoweringly scented soaps at one time. I thought it was a useful size and shape, not too big, and deep enough to hold a plant insert. I've come across many free baskets that are wide and shallow, which is good for holding magazines or whatever, but that shape not as easy to work with for taller plants that need deeper roots.
Lucky for me this basket was just about as tall as a large yogurt container, and I had a few spares ready and waiting to be transformed into soil containers. The first step was to make drainage holes in the bottom of the yogurt container. I used to do this by poking a knife through from the bottom and twisting it in a circle. This method creates holes but actually leaves little raised edges along the inside of the container, which could interfered with drainage flow. So now I've switched to making a series of V-shaped cuts along the edge, and then cutting the resulting tab off with a pair of scissors. I think this looks a little neater and I have more control over the size of the notches.
For this basket I wanted a plant with some height and shape, and I had a Christmas cactus (Schlumbergera species) ready to be transplanted. This Schlumbergera is actually a bunch of separate cuttings from a single plant that I propagated, surprisingly easy to do! The mother plant is still going strong a year later.
After filling the yogurt container with fresh potting soil and the transplanted Schlumbergera I placed it inside the shallower and wider black plastic container with no holes (I think it originally held sliced mushrooms). Then both containers went inside the basket. So easy, and basically free, just had to plan ahead and have some patience.
 |
| Checking the height of the insert, ready to be planted! |
The whole thing was part of a long running plants-for-random-help deal I have with a neighbor. The Christmas cactus basket is now in a happy new home and my own place is *slightly* more put together.
 |
| Christmas cactus in its new basket home! |
Happy freestyling and plant propagating!


