Tuesday, March 5, 2019

Oak-frame and a historical photograph

The modern cell phone, so useful, and so hard to fix if anything goes wrong. Sigh. Such is the case with the history of this little project. Photos were taken, then the phone decided not to turn back on, and the photos shall remain locked inside for the foreseeable future. Oh well, not everything needs to be recorded for posterity I suppose. You'll just have to imagine that once upon I time I found a dusty botanical print with green matting, intact glass, and a dark oak frame.... and the wheels started turning.

I know woods like wenge and teak are trendy, but I have developed a 'thing' for oak ever since I discovered the finish technique known as cerusing.  Remember this cerused bookshelf and the cerused side table that were stripped, dyed with aniline dye, brushed with shellac, and then finished with liming wax to bring out the texture of the grain?

Bold and beautiful cerused oak bookshelf


Sort of green and weathered cerused finish on side table

Those projects made me look at oak in a new way.  Instead of associating oak with pickled pink 80s faux-tropical furniture or heavy pieces sitting next to overstuffed couches in musty rec room basements I see the potential. Oak is interesting. The grain of oak is beautiful once you decide to see it that way, and vintage solid oak furniture is relatively abundant and affordable to folks on a DIY budget.   

Now that you've been refreshed about the joys of oak and cerusing let me say that I decided not to ceruse this oak picture frame after all.  I had a friend moving into an apartment that needed to be furnished, and I asked her if she wanted the frame, answer = yes.  Her style leans towards natural wood tones, so after having it sanded down to the raw oak I finished it with only clear furniture wax. Specifically I used two coats of Miss Mustard Seed's furniture wax (and no, I'm not being compensated to mention that product, I just like it).  

This style of picture frame had a series of tiny nails pressing all the backing, art, and glass together against the wood frame.  This makes it inconvenient to swap out the framed art, so here it is in an almost-finished-but-without-the-finishing-nails-installed state. Still, you get the picture, such a beaut!

Oak frame, sanded and finished with furniture wax, corner detail


Refinished oak frame, original green mat, new historical photograph

The green matting was part of the original find, and the botanical print is still there in the back, peeking through next to the white edges of the photo mat.  Maybe someday I'll get a new picture of those, for now you'll just have to enjoy the lovely salvaged and refinished frame in its new home.  The entire piece now brings a bit of warmth to the cool tones on the walls and floors in this downtown rental apartment.

Happy freestyling, and don't be afraid to take that thing that you're not sure how to use, offer it to a friend and you just might make their day!

Tuesday, February 26, 2019

Freestyle @ Friends' - Mirror makeover

The freestyle inspiration keeps happening across all the lands!  I got an email from a friend halfway across the country with one line, "This mirror is made out of some cheap wood. What do you think I should do to it if I want to paint it?" (and two attached pictures).  The pictures show a shiny-surface frame, probably a plastic-based veneer over pressboard / particleboard, but with nice proportions and a timeless shape.

free mirror, take 1


free mirror, intact and shiny veneer


My recommendation was to NOT sand the piece because that might cause bubbling later if the pressboard underneath were to absorb liquid from any paint. LEARN FROM MY EXPERIENCE! I had this happen with a scandi-superstore piece before - where I followed generic refinishing instructions and lightly sanded to scuff the surface but that then allowed the liquid paint I later applied to seep through the veneer and into the pressboard (or particleboard).  This ended up causing some low bubbles and didn't ruin the project, but it was visible in angled light. So, anyway, back to this particular mirror. I recommended spray paint primer (optional) and spray paint as opposed to roll-on paint.

The refinished outcome is below, much improved with a lighter wash over the fake wood veneer.
Yay for backyard DIY and free furniture!


Happy freestyling, and if the mirror is intact, take it!

Tuesday, February 19, 2019

Framed! In gold, and linen, and some more gold for good measure


As part of the great February Frame Find I scored this ornate vintage frame.  I loved the layering of the (fake) gold, linen texture (also probably fake), and more (fake) gold along the innermost edge. 


What I didn't like was the aged looked on the frame achieved with (or because of?) brown speckling.  At first I thought some of brown speckles and grey colors inside the raised ("carved") parts of the frame were just accumulated dust or dirt that could be cleaned off, but nope, that was part of the original paint treatment.


I realize this sort of aged treatment gives the frame a softer look, and is sometimes deliberately used to good effect  to show the detail of the 'carved' details on the frames - often done with glazing.  This softer look is definitely less hard and shiny, but to my eyes it also made the frame look dirty and that made it distracting.  So after a full cleaning it was time to get out the Antique Iridescent Gold paint and my tiny brush (yes, still the one that was chewed up by a previous roommate's cat) and get to work. After two-or-so coats of paint I'm satisfied with the lighter and brighter and glow-ier look.

Post-paint and sitting pretty

The 'carved' design around the outer edge of the frame - which to me looks like apostrophes and quotes - no longer has gray color in the grooves. The inner corner rope-like detail is not so dark as before, and the brown speckles that were along the broad flat areas have been covered over.  In a few spots they still add a bit of shadow from behind the paint, but I'm ok with that because it breaks up the uniformity of color and the very non-uniformity of my uneven brush strokes.

Corner details, from gray to glowing.

I don't have a painting or photo to put in this frame yet, so the full reveal will have to be at some future date.  Perhaps a seascape? 
In the meantime, remember the transformative power of paint, and happy freestyling!

Friday, February 15, 2019

Meow That's A Fun Frame Find

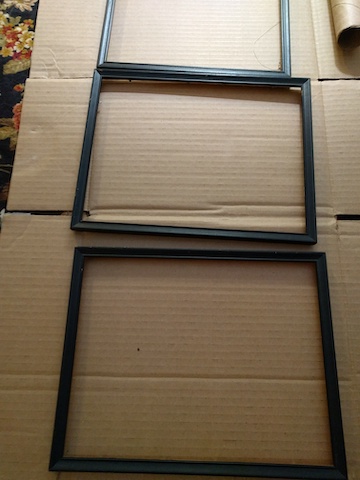
One night a neighbor friend was browsing his building's message board and saw that someone was leaving a bunch of picture frames outside their door, for free, obviously.  He scampered over and grabbed a whole box, following the scavenger-hoarder mantra of 'take it now, figure it out later.' Approve.  After taking what he wanted he offered the box of associated small frames to me, and I managed to find a group of frames the same style, all around 8x10 to 8x12.  Yay for third-hand picking! It felt positively luxurious to lay out the frames on the floor and look at them all instead of grabbing a box and scurrying off into the night.

Here is a snapshot of the 'before', very basic black wooden frames, at least 20 years old.


Basic frames sitting on cardboard

I have a different friend who wanted to add some art to his walls for the bargain price of next-to-nothing, and was into the idea of painting some free frames with gold paint. Below is one of the frames after the first coat, not very encouraging, but I knew that it takes a few coats of gold to really build up the shine.


In process, don't judge it yet.


Here is the final product, with a picture of the beloved cat printed out at a local drugstore.

Kitty says Meow!

Now we just have to finish painting the rest of the frames, find and print some more suitable artwork (probably more cat pictures), and arrange a custom gallery wall. Stay tuned.

Happy freestyling!