Garden of freestyle delights
How a scrap wood planter came to be.
The evolution of a patio from a nondescript outdoor space into a garden during this time of quarantine has been a welcome relief. Projects provide purpose. Gardening is known to be therapeutic, and for me, an extra layer of joy is added when the creation of a garden becomes a cross between a freestyle treasure hunt and impulse plant-buying. In these 'Garden of freestyle delights' posts I'm going to describe different projects that have been part of this garden evolution.If this space had all been planned - as a whole - from the beginning it would probably look much different and be worthier of Monty Don's approval. As it is, I hope he would appreciate the spirit, the creative reuse, and the adventure of how it has evolved so far. So let's get into it.

It started with finding some free pots set out on recycling night, like these.....
 |
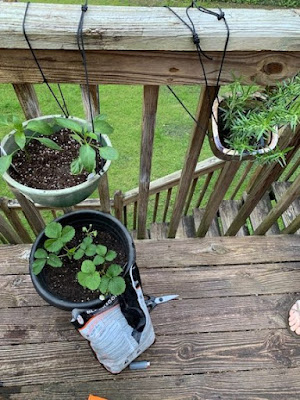
| Sturdy black plastic pot |

...and for a while it stayed quite modest.
A few modest plants hanging out, waiting to see if they would get destroyed by insects, or birds, or the cat.

Just a few pots on the edge of the patio.
Nothing special.
Hardly even noticeable.....

Then I got access to power tools and a whole new world of possibility opened up.
This meant that not only could I use freestyle planters (plastic, ceramic, etc) for gardening, but I could use freestyle scrap wood to MAKE MY OWN PLANTERS!!!!!
Depending on where you live and the time of year there may or may not be lots of scrap wood out on the sidewalk. But let me tell you, in a warm-weather climate, during a time that coincided with spring cleaning AND a quarantine where people are at home AND beautiful weather for home renovations....
....yeah, there has been a lot of scrap wood out for free.
If I had a truck to pick it up and a giant lawn I could make raised beds for days. But, as things stand I am mostly only taking what I can carry. But I digress, let me return to the cucumber box. I found a slightly rotting wooden table very close to the patio, and convinced a friend to help me move it. In my excitement I didn't take a 'before' picture. But it had two boards across the top, and two rectangles made of 2x4s for legs.
Construction
I realized that I could flip the setup of the existing table, use the table top as a base, and use the leg rectangles - stacked one on top of the other - as the sides for a planter. I wouldn't even have to make any cuts with my glamorous hand saw.
Here is what the wooden pieces looked like after I removed the legs from the 'table top' pieces and laid them out to see what the planter would look like. My plan was to secure the rectangles to each other, and secure the lower rectangle to the wooden base pieces using metal L-braces (purchased from a hardware store, using money).

I even saved the screws that I pulled out in case there was a way to reuse them. They were very rusty.

Remember how I mentioned that the table was 'slightly rotting'? Yeah, well, it has clearly been sitting outside for weeks (multiple months?), and there were mushrooms growing in the cracks.
I took it as a good sign.

Here is the planter box after assembly and placement in the corner of the patio. If this box were going to be moved often I would add a few more braces and brackets between the different parts, but the current plan is to use this for only one season.

You might notice that the planter box seems to be elevated off the deck. Good eye! I didn't want the wooden base of the box to be sitting directly on the decking, so I stacked up some pieces of polystyrene to use as 'legs'. I figured this setup would allow for airflow and better drainage. If polystyrene will last 10,000 years before degrading, then those legs should be able to handle the warm and rainy weather here!


The final step before adding the potting soil was to drill some more drainage holes in the base. The two flat base pieces already had a slight gap between them from being warped and weathered, but I wanted more drainage. Drainage drainage drainage and no worries about rotting roots.

Since cucumbers are vining plants I wanted to add a trellis. Obviously I did not want to pay for a trellis. In classic scavenged freestyle beauty fashion I found this pieces that appeared to be an old children's art easel out for the taking. I actually walked by it (along with various other discarded wood pieces) for a few nights before being able to pick it up using a friend's car (separate story there about looking for trellis supplies). I took apart the V-shaped easel and used one half of it as a trellis base for these cucumber plants. The easel piece was just the right width to fit across the width of the planting box and to sit on top of the little shelf created by the long table-top-turned-planter-bottom pieces. To give the cucumbers something to climb I added twine strings tied at the top, wrapped around each cross piece on their way down, and tied to another cross-piece of twine at the base.

Conclusion
There you have it, a freestyle scavenged scrap wood planter box and trellis. The only costs for this project were the L-shaped brackets, the twine, the potting soil, and some small cucumber seedlings -- all from the hardware store. Check back for other posts about creating a garden on the freap (free+cheap).
Happy freestyling and gardening.
"He that plants trees loves others besides himself."
--Thomas Fuller


