Showing posts with label plant. Show all posts

Tuesday, August 4, 2020

Garden of freestyle delights - (another) scrap wood planter and a painting experiment

Upcycled Scrapwood into Painted Planter


When life gives you scrap wood, make scrap wood planters!  That has been my motto lately, and it has been fun to see what can be created out of a few leftovers by making as few cuts as possible.  The picture below is the bottom of the assembled planter while I was completing the last construction step -- drilling drainage holes into it. It's definitely made of leftover pieces, you can see someone else's pencil marks.

Bottom of scrap wood planter with drainage holes being drilled.


For this scrap wood planter I decided to try painting the outside with some really cheap poster paint.  The paint CLEARLY SAYS it is water-soluble, so I did not expect my paintings on the wood to last very long past the next rainstorm. But I was also curious about how much paint would sink into the wood and how long it might persist while living outside in the elements.

Here is the assembled planter before any painting.

Scrap wood planter and poster paint ready to use


I looked for some Art Deco inspiration, in the very loosest sense, and found a butterfly and a lotus - both of which seem like appropriate themes for garden art.  I have near-zero decorative painting skills, but this seemed like a good place to play around and try something new.

Painted Planter Results


I had 6 colors of the poster paint but didn't try to use them all, in this case simple was the goal.  

Below is the first side, painting inspired by an Art Deco jewelry piece I saw online.


Scrap wood planter painted with Art Deco butterfly motif

Below is the side that I painted with a lotus-inspired design. Van Gogh I am not, nor Monet.


Scrap wood planter painted with Art Deco lotus flower motif

Conclusion

Lucky for this scrap wood planter painting experiment there was a rain event the very same night that I painted this planter and planted it with some scallions. (Yes, those are scallions purchased from the grocery store for 99 cents per bunch that I replanted in the garden.) The photos below shows how much washed away in that first rain event, just hours after the paint had dried.
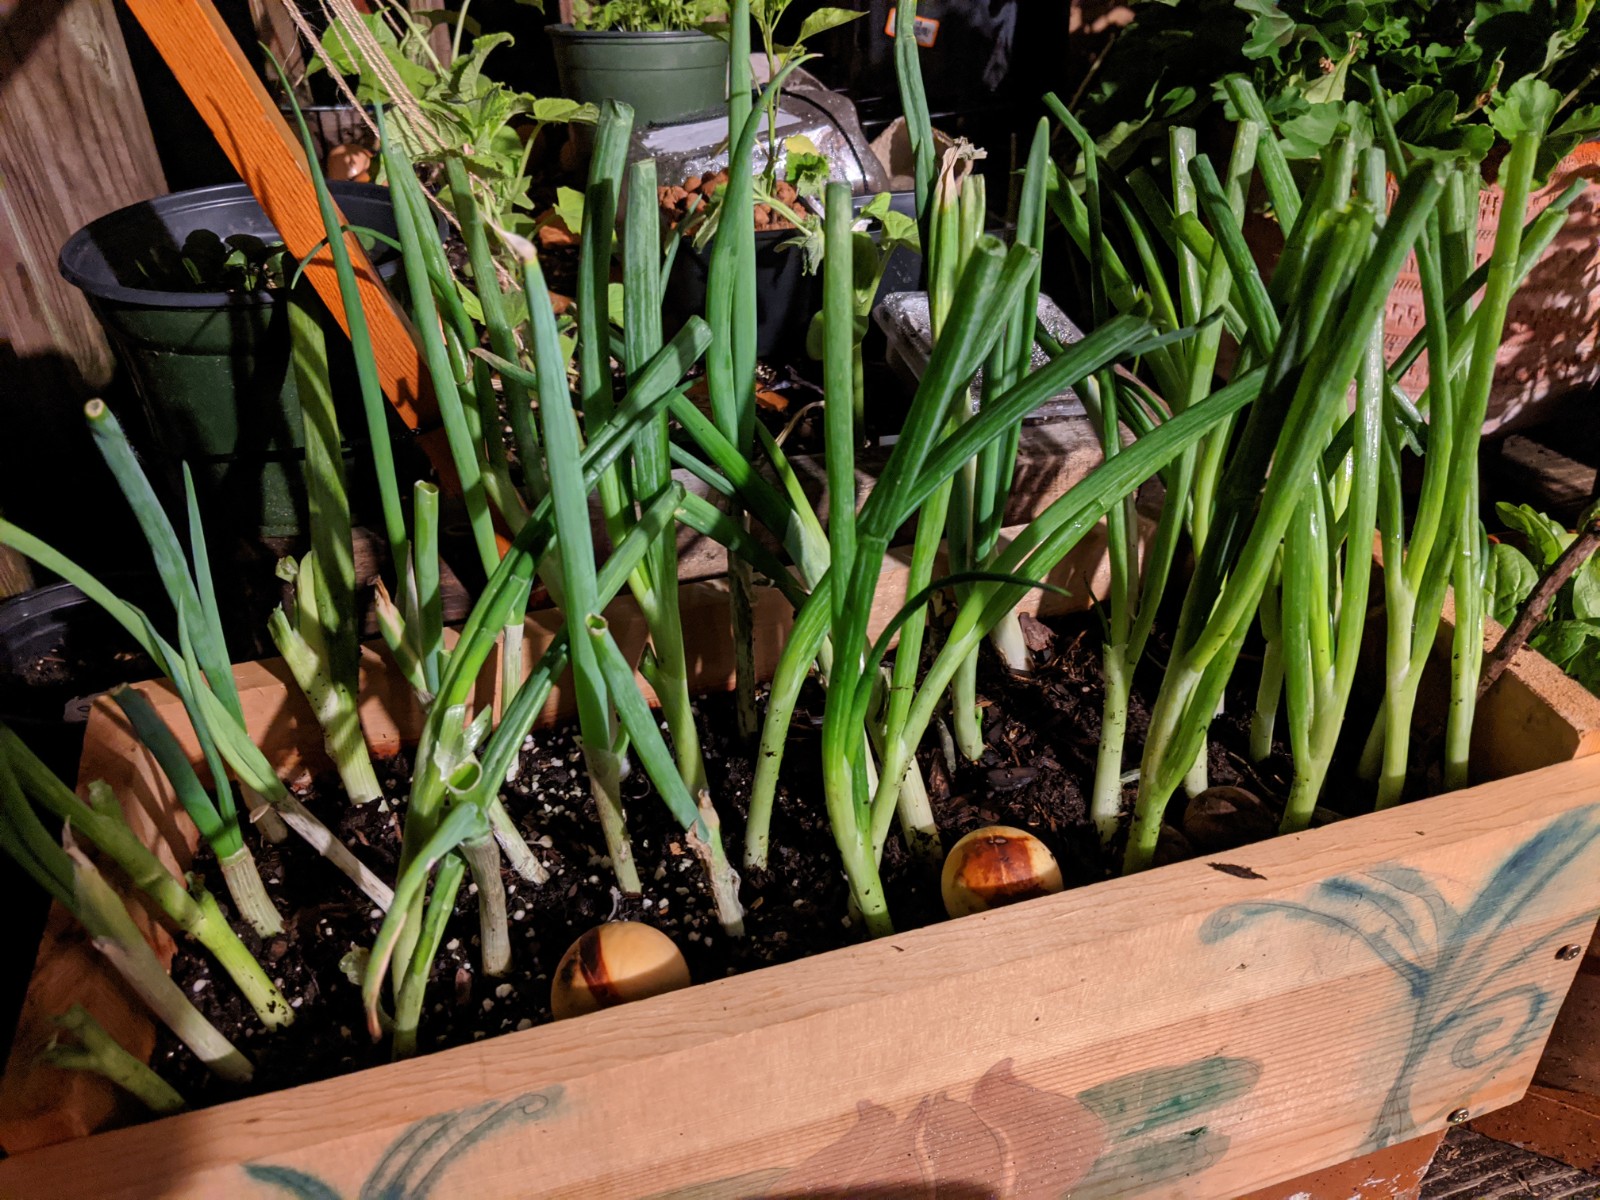
Scrap wood planter with scallions and faded Art Deco lotus flower motif


Since the paint fades so quickly I wonder if this could be a technique to use if someone wanted to quickly create a 'weathered' look along new wood (it would be someone who had poster paint, but not other traditional aging washes like nails soaked in vinegar).  You could maybe use a mix of white, gray, brown, and black paint applications to mimic varied textures, let it sink into the wood and dry, and then wash the wood.  I have no idea if that would look reasonable or like a decrepit art project from some long-ago children's art attempt. 

This was a fun project, and all for the cost of a few screws and some $2 bottles of poster paint.  

Happy freestyle-garden-ing!


Saturday, June 13, 2020

Garden of Freestyle Delights - Hanging Garden Using Leftover Mesh Produce Bags

Mesh of a bag

Single use plastics are generally bad, and yet really hard to avoid.  One specific type of single-use plastic that seems ripe for re-use is the open-weave mesh produce bag. You know the one I'm talking about. They look like discarded fishing gear (big problem, separate topic) but contain something delicious like avocados, oranges, or onions.  To open the bag to get at the delicious delicious food you usually have to cut or rip open the plastic mesh, leading to plastic bag bits everywhere. Then what to do with this meshy mess? Can it avoid immediate transportation to 10,000 years of landfill time?

The idea

At some point a dim dim lightbulb went off in my head and I realized that if these mesh bags were rated to hold 3 or 5 pounds of produce they could also be used to HOLD PLANTS AS HANGING PLANTERS.  So. Obvious.  I just had to see if I could get rid of the labels without destroying the mesh.
Here is an example of what I started with.

Citrus produce bag on yellow chair
Produce bag about to start a new life


Hanging garden of (something that was) eaten

After accumulating a few produce bags (shockingly quickly) I carefully removed the labels. Some brands have large labels that are just a tag on top (nicer for this project), and others like this citrus bag have big colorful plastic labels that are bonded along the whole length of the mesh. I'm sure there is a reason for this related to processing efficiency, but this style was much harder to remove without either leaving little bit of the label on the mesh, or tearing the mesh.  Good thing it was free.  Below is an example of what I ended up with.

 
Plastic mesh bag with label removed
Mesh bag post label removal


I had saved a set of four small hooks from some trash pile (I think they are the kind usually used to hold an over-the-door mirror if I had to guess) and they were the perfect size to fit over the fence cross pieces.  However, you could also use some string or twine to suspend these from a hook. I had some small planters that fit stably into the mesh and hung them up along the fence. Simple as can be.  The cut ends of the mesh were a little messy looking, so I gathered and folded the edges in a bit to make it look neater.  In case you're curious the plants are from left to right: begonia seedling, zinnias growing from seed, begonia seedling, nasturtiums growing from seed. If you're going to use your own mesh produce bags I'd suggest using square plastic containers instead of round ones, because you can poke the corner through the holes in the mesh to help secure the plant pot a little better.  Maybe this only matters if the hanging garden will be subject to gusts of wind. I think the blue bags came from onions, and the orange bags were from citrus purchases.  

Four mesh hanging bags with plants
Hanging garden, no tools required


So that's my first attempt at making a hanging garden out of leftover mesh produce bags. It keeps smaller containers away from foot traffic and adds some plant love to this awkward fence section.

Happy freestyling, and don't be afraid to experiment to make your own scavenged beauty garden setup!

Tuesday, May 26, 2020

Patched Pink Patterned Planter

The Find

Thank goodness for people who leave the broken parts with the rest, so that someone could fix it if they wanted. That was the case when I found this large planter with a cool patterned exterior a few weeks ago.

Broken planter, overhead view


Broken planter, side view


I liked the patterns on the outside that reminded me of cuneiform. So even though it was heavy (as large ceramics tend to be), I'm glad I muscled up and carried it home from the neatly arranged trash pile.

The Repair

My friend already had some epoxy on hand.  The brand has worn off the labels, but the epoxy is the kind the is stored in two bottles, you have to mix Part A and Part B together on a mixing surface and apply it within a short amount of time.  So after dry-fitting the broken parts to the main planter I got my gloves on and got to the gluing.  No pictures from the epoxy-application portion because I had to work quickly 

The Results

The epoxy dried clear but still 'wet' looking. The epoxied connections felt quite secure after drying for a few hours.  However, I knew I wasn't going to be attempting to stress the repairs. Whenever I move the planter I pick it up by the main, intact, section. 

Repaired planter with epoxy joints, oblique view


Repaired planter, 3 re-attached pieces, top view


Repaired planter, side view


Conclusion

During a different evening walk I had found a large plastic plant pot in someone's discard pile.  I thought it would be perfect to use as a planter stuck in the corner so the logo wouldn't be visible, or perhaps an insert in a cachepot (although I didn't have one at the time). Really I was just looking for more free dirt-holding containers to use for growing strawberries.  But this it fit perfectly inside this pink pot....
 The pink patterned planter does have a drainage hole in the bottom, but I didn't want dirt pressing directly against the side of the pot and potentially stressing the repaired parts.  **Another** happy coincidence was finding a slightly sad, but large, geranium plant on sale for $2.99.  

Repaired planter with plastic insert and geranium plant


The geranium got repotted into the larger white insert and that got placed inside the newly repaired pink patterned planter.

Geranium in newly repaired planter


Happy Freestyling. Don't be afraid to find your own scavenged beauty.

Tuesday, March 12, 2019

From trashpile top to countertop cachepot

Is there any better way to end an afternoon-into-evening-craft-session-with-snacks than with a trip to the loading dock? Probably not.  The hostess found some small photo frames and a free trash can (because who wants to spend money on a trash can?). I found an interesting glass vase, made in 2009 according to the etched year on the bottom.

The next day I turned the glass object into, what else, a planter.
All I needed was an empty yogurt container with drainage holes cut into it, some potting soil and pothos cuttings.


After a few minutes of arranging, some dirt-pouring, and a little more arranging, I had a new cachepot for a pothos.

Pink glass on top of blue glass, now with a plant!


Nothing like some pothos leaves against subway tile.  The glass object doesn't look right with the countertop, it will find a home somewhere else.


Happy freestyling, and when in doubt, maybe you can turn it into a planter!

Tuesday, March 21, 2017

A basket for texture

Many design blogs talk about 'layering' the elements of your room, and the importance of bringing in different textures to create this more visually interesting layered look.  Message received!  So when I found a small basket I knew just what it could be, an outer container for some sort of plant. Texture on texture for the win.


Sharp-eyed readers will notice that the interior pot is much smaller than the basket diameter. I didn't have a perfect plastic liner for this basket, but these 'Himalayan Mix' plants from the scandi-superstore seemed voluminous enough to balance the size of the basket although they were a bit short.  The solution is that the interior plastic plant pot is sitting on top of a ceramic pot to make the whole arrangement tall enough to stand above the edge of the basket.  It also helps add a little weight and stability.  So there it is, a little corner of my universe, filled with plants. And texture.

Happy frestyle gardening.

Tuesday, September 13, 2016

Ferns and friends

The Boston fern is a houseplant that keeps on giving.  For a few dollars this grocery store purchase has grown and been split multiple times, with clones now living among multiple friends. 
At one point during a plant thinning phase I gave this fern cutting away to friends.


They liked it, and so did their cat (Boston ferns are listed as non-toxic and cat safe by the ASPCA website) who regularly chomped on the fronds.  In order for the fern to survive my friends moved it outside to the patio.
The owner writes "fern is doing much better after the cat stopped mowing it."


Happy freestyling and gardening!

Monday, August 4, 2014

NQF: Silver bowl into succulent planter

Remember the succulents + silver combination?
It hasn't gone away!
In going through my photo archives I rediscovered this arrangement that combined what were possibly free succulents, or at least some free cuttings, with a tarnished silverplate bowl from the thrift store.

big plant and little plants
Here is a photo of the final project in its original planter-hood in Cambridge.

soakin' up some sun
Happy gardening, no matter what size you have to work with, and always happy freestyling!

Tuesday, February 5, 2013

NQF - Vintage ice bucket becomes a planter

[author's note: I thought I published this post earlier, but according to Blogger it was still a draft, so if you have seen it before, well, you know how it ends, if not, read on!]]

Say hello to the NQF.

Not Quite Free, a designation I'll use when there is something oh-so-worth-sharing that involved paying money somehow. Surprising perhaps, but it does happen.


I write this from deep within the throes of my succulent obsession.  Lately I find myself perusing the shelves of Central Square thrift stores with an intense eye for anything tarnished and ornately fashioned.  It can't just be silver, it has to be slightly aged.  It has to be ornamented, with some sort of scrolled, molded, or floral decorative motifs to have the right look I'm after to round out my vision for a shelf of succulents in silverplate planters.......

Behold the ice bucket!!


I thought the substantial depth would allow for a thick gravel layer at the bottom for adequate drainage of the plants.  Am I the first to post about re-using an ice bucket in this way? Probably not.  Did I know what I was doing when I decided to take out the old and crumbly lining/insulation that connected the ceramic insert to the silver? Most definitely no.  After my deconstruction I discovered that the white ceramic insert was just sitting on a rough wooden block to keep it from touching the metal.

I added planting materials (gravel, succulent/cactus potting soil) and my plants - a mix of purchases from a local florist and the Scandinavian superstore (who would have thought?).  Check out the results.


I should note that at first I thought this doohickey was a soup tureen.  It was Creative Roommate who said, "oh, it's an ice bucket, my Aunt ----- had one of those when I was growing up."  Nice.

Project costs
Ice bucket from the Goodwill: ~ $8.99
Plants (from 2 different stores):  ~ $15

While the planter and plants were not quite free, the inspiration certainly was.  Check out some the pictures that inspired me (below) or search for 'succulents and silver' to find your own favorites.
via Pinterest

via Garden Therapy featured on Shelterness

via Antiquechase
I'm impressed with the trophy cup on the left, it adds such nice height variation.

This won't be the last post describing succulents planted in silverplate containers, so stay tuned.
Happy not-quite-freestyling!


Tuesday, January 15, 2013

Lampshade to dirtshade

Over a year ago a previous roommate and I found a pair of white glass lampshades at le dump.  Now, maybe if we were re-doing a bathroom, or had pendant light fixtures to fancy up, they could have just been installed as intended and spent the rest of their days as plain old white glass lampshades, same old same old. Yawn.


What purpose could be better than filtering the light of a "soft pink" compact fluorescent bulb?  Why, supporting dirt of course!  Despite not having the ideal bottom configuration for dirt retention, they were put to use as planters.  I managed to watch at least one orchid wither away into nothingness while cradled inside this sleek environ, sigh. (Orchids continue to elude me.)  But I did not remain discouraged, when time came to split a mystery plant (Philodendron spp.?) that been hanging in the window I knew just what to use.


(Why, yes, those are free books peeping out from the bookshelf there. How kind of you to ask, alas I have not yet read them all.)  The Philodendron spp. (?) seem happy in their new homes away from the direct sun, and we now have a nice little symmetrical arrangement for the bookcase top.  Everybody wins!
Happy freestyle.

Tuesday, September 25, 2012

Owl together now

Owls seem to be quite fashionable as of late, and I’m in support of their popular resurgence. I appreciate their classical association with Athena, they are beautiful birds of prey, and they have curved faces that concentrate sound (much like a satellite dish concentrates a signal). Awesome.   
Given my enthusiasm you can imagine my double delight when I found this charming pair of owls with old tea light candles inside of them on the swap shelves at le dump.  After cleaning them up they looked like this:  

 I’m not a candles person, so how best to use these glass containers?  My natural inclination was to make them into planters, and with the leftover moss from a centerpiece I did just that.

It seemed fitting that owls should perch on the bookshelf, out of direct sunlight of course!  Maybe their steady gaze over the shoulder of the reading chair will help us attend to our studies...


Aside from owls, another awesome thing from a strictly freestyler point of view, is the start-of-September move time. Good weather, the end of summer sublets, and the start of new leases means Cambridge is on the move.  Labor Day weekend’s good weather this year also saw 'yard sales' springing up on front steps and sidewalks, such fun to peruse, even though I don’t aim to spend money on miscellany.  Stay tuned for the results from our walkabouts…. 

Thursday, September 6, 2012

September Celebration of Succulents, continued

You might remember the fabulous wedding centerpiece I showed in the previous post, if not, here it is again.
It took a while to deconstruct this lovely arrangement, but my hope is that the extracted plants will take root in Cambridge and live happily throughout our apartment.  I didn't take any pictures of the deconstruction, but it did take long enough for someone to make cookies, someone else to make gazpacho (both from scratch), and it continued on after the lunch break. whew!

What was involved in all of this? (approximately)
1. Remove the twigs, flowers, and ivy (all the stuff that was easy to pull out)
2. Discover that some of the moss and succulents were glued together, pull them apart gently
3. Rinse out the metal tray and plastic liner, for future use
4. Delicately cut the foam adhesive away from the base of the succulents
5. Make tiny cuts at the base of the succulents, roll in rooting powder
6. Find/decide on planter pots for the re-potting process
7. Put dirt into pots, then plants into dirt (without brushing off the rooting powder)

The end result looks wonderful, I just hope they thrive!

Beauteous variety
 Can you spot the freestyle planters in the photo above? 
The adobe rectangle, the teensy pink & white bowl, and the owls!
The orange bowl and the black bowl are spare plastic cereal bowls from the apartment.

Moss, just moss


 I found the off-white ceramic bowl (above) at the DPW.  Right away I knew I wanted to start a succulents garden, I just hadn't gotten to the plant nursery- good thing I waited.  It was the perfect size for these little beauties.

Rock garden, in a groovy rectangle planter

Piling on the freestyle
Keen-eyed readers might notice that the demi-lune style table against the green wall in our living room was also a summer street find. Freestyle x2.

What a super (succulent) September this has been so far. I can't wait to see what else turns up.

Monday, September 3, 2012

The Start of Some Succulent Love

Weddings are a celebration of love and friendship, and although a small wedding favor gift-to-guests is common I don't usually think of weddings as potential sites for freestyle ingredients.  Maybe some of you have gone home with a lovely cut-flower centerpiece arrangement in the past?  Well, at the ceremony of two dear friends over this past labor day weekend I saw something new-to-me in terms of wedding floral design, a succulent themed flower scheme.  The bride had epiphytes (aka "air plants") in her hair, and all the bouquets were made out of small rosette-type succulents.
Bridal Hair Greenery!
When I was complimenting the bride on the absolute coolness of this idea, she told me to take one when I left.  So thanks to K&F for having part of their wedding transformed into a Cambridge Freestyle first!
Behold my awesomeness!

Ok, the sharp-eyed among you might note that there are a few non-succulents in the mix; e.g. calla lily, yellow orchid, ivy, some other leafy stems I can't identify, and mosses! Such beautiful mosses.  While I didn't want to deconstruct such striking centerpiece the plant-grower in me wanted to get those succulents out of the florist foam and into the dirt.  We'll get to those in the next posting....for now you'll just have to enjoy the vase arrangements that Creative Roommate put together with the pieces I couldn't replant.

A small vase to brighten up a desk.....

A lovely reminder of K & F to grace our kitchen table.
Here's to you K&F: wishing you life, love, and freestyle!

Sunday, August 19, 2012

Suspected Stoneware

Found: White ceramic, stoneware-feel, planter. Hallmark: that big flower delivery service, made in China.
Location: Cambridge DPW shelf
Original Condition: Slightly soiled. (pun intended!)

I love stoneware, the smooth-but-not-slick feel of it, the way it looks almost soft. I'm always happy to find these kind of pieces, and even though this one wasn't marked as such, I'm calling it stoneware.
Here is a pic after this little beauty got home, had a good scrubbing, and I repotted a trio of jades to fit inside.

This freestyle find became part of mega plant giveaway #2.  I had been growing the jade cuttings for a few months, and they were very happy in my windowsill.  Now they are very happy in their pretty planter in another Cambridge apartment. Passing on the freestyle!


Thursday, June 7, 2012

A bronze y-urn-ing


Can you tell what I'm trying to say?
Found: small bronze-color tripod urn, with 3 decorative lion heads on the outside


Location: Swap shelf

Question: Can you identify the mark or writing on the bottom of this mystery metal urn?

My guess for the lower stamp is some bird (eagle?), possibly double-headed.  The ovoid text stamp remains a mystery, I can't tell if the letters are from the greek or cyrilic alphabets, or what they say. Any suggestions?


Time for a bath.


From the quality of construction I'm under no delusions that it is of any value, likely some souvenir trinket, the grey stuff in the first photo is perhaps solder from where the leg section was attached to the round vessel part.  Despite these flaws, I rather liked the shape. It looked like it could be a cool little planter, and I'm always on the lookout for plant storage.


At right is a 'before' photo.  As you can see, it is a bit dinged up, with some mystery white residue in the small details of the lion heads and the design at the top of the legs. 


After a bath, some delicate cleaning attempts, and the application of a glaze to the inside and out, I declared it done enough.  Soaking and then scrubbing did not remove all of the white stuff, so I left it there rather than scratching up the metal in an attempt to remove it. C'est la vie. Or rather, c'est la métal.

The glaze made it look smoother, shinier, and hopefully will protect the inside from any plant water.  I added glaze because it did appear to be rusting on the inside when I found it, not very exciting, hence no photo.  But there you have it, a little urn and my new fragrant rosemary seedling.


These lions don't have to worry about thorns.
Guardian of good taste.