Showing posts with label glass. Show all posts

Tuesday, March 12, 2019

From trashpile top to countertop cachepot

Is there any better way to end an afternoon-into-evening-craft-session-with-snacks than with a trip to the loading dock? Probably not.  The hostess found some small photo frames and a free trash can (because who wants to spend money on a trash can?). I found an interesting glass vase, made in 2009 according to the etched year on the bottom.

The next day I turned the glass object into, what else, a planter.
All I needed was an empty yogurt container with drainage holes cut into it, some potting soil and pothos cuttings.


After a few minutes of arranging, some dirt-pouring, and a little more arranging, I had a new cachepot for a pothos.

Pink glass on top of blue glass, now with a plant!


Nothing like some pothos leaves against subway tile.  The glass object doesn't look right with the countertop, it will find a home somewhere else.


Happy freestyling, and when in doubt, maybe you can turn it into a planter!

Tuesday, November 22, 2016

Suburban surprise...with scrollwork

During October I spent a weekend with friends, nothing surprising about that.  After dinner we went for a walk, nothing too out of the ordinary.  Then, when we were only 1 block from their house we came across a bunch of discarded items that had been set out for trash day. Jackpot!  Does the freestyle follow me? No, really its just that once you start looking its hard to stop seeing.
It was dark but from what we could see of this metal and wood table it was servicable and in ok shape.  It had nice scrollwork details, probably over a decade old based on the styling, aaaaaaand the amount of dust on it.
I kid, it actually wasn't too bad, just some dust inside the scrollwork- because who would dust that?


After the requisite cleaning we paused to look at it.

We could't tell if the wood was solid, burl veneer, or maybe some sort of patterned pressboard product.  Furniture mystery.
There were a few spots where the knots/burls had been scuffed, so maybe that means there is some real wood?  If anyone is more informed about this table or others like it feel free to leave a comment.
The next day we swapped some tables around and arrived at this arrangement.  It works for now since the heavy metal look doesn't really go with the rest of the furniture, but since you only see bits of it from the rest of the room it doesn't overwhelm the space.

Yes, that is a cutting originally from my fern, all grown up!

Its a useful entryway table and sofa end table.  For $0 I'd say it was a lucky night on the town.

Happy freestyling.

Tuesday, August 23, 2016

Polluter to purifier - part 2

Regular readers may remember the first polluter to air purifier post, where I converted an old wax-in-glass candle into a planter.  That particular find actually came with two discarded candles, and here is the story for the small white glass cylinder.

The finding...


The cleaning...

waiting for a second life


And after I had re-potted a spiky little aloe into the glass.
 Note: When planting succulents in containers without drainage holes you have to be very conscious about NOT overwatering them.


So there you have it, two different wax-filled glass candles, saved from the garbage dump and given new life as planters.

Happy freestyling and gardening in whatever space you have.

Tuesday, August 16, 2016

Lotus Flower, framed

Behold the lotus flower in all its beauty.


This summer I found a large black frame (19"x15") with black faux-velvet texture along the backing board, and the glass was intact (always a pleasant surprise).  

Frame back


The only problem was that there seemed to be a layer missing, perhaps a matboard, that made the inserts fit the frame snugly. You can see the gap in the picture below.

Mind the gap!


Luckily I found some discarded foam-core board from a party advertisement. It must have been fancy, but I was just happy to get some free framing supplies.


I laid the original frame backing (the brown piece) on the foam-core board, traced, and cut out a piece to fit the frame.  So I had a frame, but for what?  Soon after that I was able to get some good shots of lotus flowers, and they seemed like a fitting subject for framing, so I had some 8x10s printed.

Here it is after assembling the frame and arranging the little table.  I might hang it on a wall somewhere, but for now it is happy leaning against the wall.


   And yes, almost everything you see here was free. The small statue belongs to my roommate, and of course I paid for the lotus photo print, but everything else was found for free.


Happy, peaceful, beautiful freestyling!

Tuesday, April 26, 2016

From polluter to air purifier (indoor gardening DIY tutorial)

DIY Tutorial : How to make a cachepot from an old candle

As I was walking by the dumpsters one night, y'know like any common person, I saw this basket of stuff off to the side.  Why didn't I take the basket too??  I was clearly too distractedly excited about finding the two candles inside.  You can see there were two, one blue, one white.


Here are the two candles in my sink, waiting to be cleaned out.


I'm not a candle person to begin with, and those things smelled STRONG. Like crazy perfume strong, no way was I going to keep them around.  I couldn't wait to get the wax out and start the transformation into pretty glass cachepots.

Using a flat screwdriver I was able to break the wax into a few sections and then just flip it out.  It was a little trickier in the blue glass jar because the lip was narrower than the base.After getting the visible wax out I ran the glass through the dishwasher to try to remove the smell and soften up the glue that was attaching the wick to the base. Getting the wick removed from the bottom took a few minutes because it was hard to get a grip on it with the waxy covering that remained. Patience prevailed in the end.

You can see I accidentally scraped the paint in a few places, but its not obvious if you are looking at it from the outside, only when light is shining through from the outside. 


I had another Haworthia succulent that needed a new home, so I cut down a coffee cup to match the height of the blue glass and poked a few holes in the bottom for drainage.


It was just that simple! Voila, a fancy free cachepot saved from the trash pile.


To recap, here are the DIY tutorial steps to make a cachepot from an old candle:

1. find old candle

2. using a flat screwdriver carefully poke through the wax down to the glass and cut the wax up into pieces.

3. Using the screwdriver as a lever, lift out the wax pieces and discard (unless you can think of a great way to reuse candle wax, maybe to wax a sticky drawer slide?)

4. If the wick is glue to the base of the candle try to pry it up with the screwdriver, it may take a few minutes of prying and gently pulling on the wick with your fingers. Keep a paper towel around to wipe off the wax as needed.

5. After you have removed all the wax, wash the glass jar

6. Insert new plant, either directly into glass or via a smaller planter set inside.

Happy freestyling and indoor gardening!

Tuesday, June 9, 2015

Why you should accept spontaneous dinner invitations


I love it when other people do their spring cleaning, especially if they are thoughtful enough to leave things outside for me to find.  One night after spontaneous dinner at a friend's house I came across a large silver-color frame with a matted print inside, and cracked glass.
   (Pardon the grainy photo, it was taken at night so I had to lighten it up a bit.)

Cracked glass, but worth the weight of carrying it home.

 Even though the glass was cracked I carried the whole thing home a few blocks.  Nothing like some light lifting of freestyle finds after dinner to make the evening feel like a true adventure.

Oh glass, why you gotta be that way?
 Once home I was able to safely remove the glass and safely dispose of it inside a cardboard box.  After cleaning the frame I had to find a suitable new piece of art to frame since the original print, while striking, doesn't flow with the rest of our decor.

Solution, a map!


I found a colorful city map  with the right dimensions to fit the existing mat opening.  I haven't replaced the broken glass with any new glazing material, but with the original backing, matting, and spring clips the piece looks neat and tidy.

Happy freestyling.

Monday, August 25, 2014

Who's hungry to see the food wall again? With sea food!

Every time I dive back in to the photo archives I'm amazed at how many little projects came out of our sunny Cambridge apartment.  Imagine all the creativity that could be unleashed, and the trash avoided, if every community had a swap area run by their local department of public works.  This clip frame (missing one clip) was salvaged from le dump during one weekend visit.  I know the picture is rotated, but maybe the original piece was supposed to be viewed that way?  That one will have to live in mystery.
this way or that? 
After a frame cleaning and a commission to Creative Roommate, there was a new addition to the 'feeding wall' in the kitchen.

nom!
This neat watercolor of a bird eating an octopus joined the ranks of animals eating in the freestyle kitchen gallery.

so many appetites

Happy freestyling!

Thursday, March 6, 2014

A long-empty frame inspires a flurry of action

On a trip back to lovely snowy Cambridge I visited some old friends.  Not just any old friends, but people who were still living with some of the freestyle finds I had collected while sharing their apartment.  One such example was this gold metal frame with red matting and glass. A heavy old thing, and with mystery spots on the front that I had never managed to remove.  It hung on the wall for many months, framing a piece of living room space in its reflective silence.
  Whether it was the sunny afternoon, the inspirational powers of crafty ladies assembled in the same room, or the hustle and bustle of people coming and going, something made that the day the frame got used for something like its intended purpose.

Step 1: Apply miraculous goo removal substance.
Removing sticky bits on the glass


Step 2: Rediscover rolled-up poster that was otherwise going in the recycling bin
 Put poster into new cleaned frame.

Step 3: Admire.

Also admiring those mustard yellow pants.

Happy freestyling!

Friday, January 25, 2013

Lampshade to dirtshade - Update!

You might remember an earlier post about some glass lampshades repurposed as planters.  Here is the original photo:


Did you notice the mismatched saucers?  Well, I sure did. It was okay at first, they were at least the same color, but one was octagonal and the other round with some floral impressions, not exactly a matched pair.  I thought I could do better, it is the living room after all.


People seemed to be getting of dishes left and right during November and December, so when I found these nice little tea saucers with gold painted edging at le dump I knew exactly where to put them.


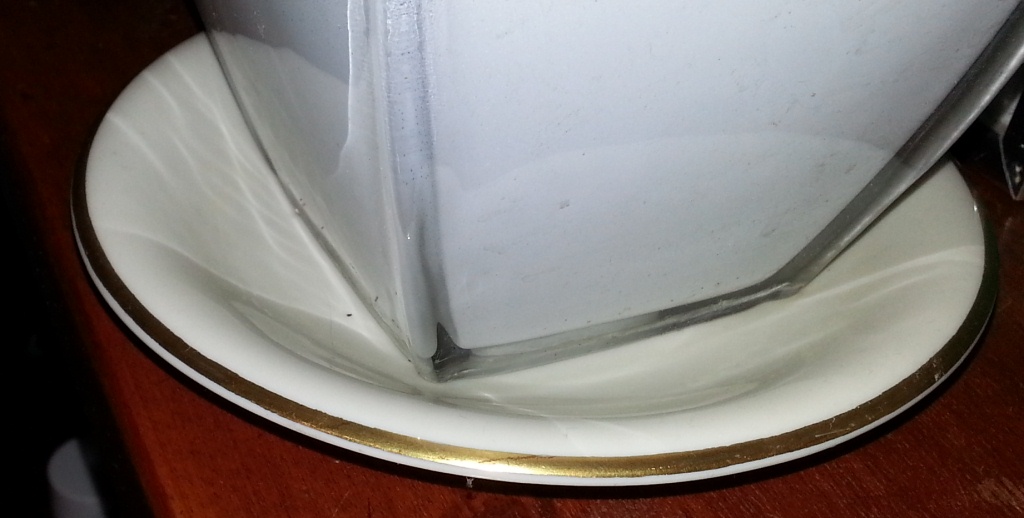
Nice rims. 

Happy freestyling, and keep your eyes out for tea saucers, they always seem to come in handy.

Tuesday, January 15, 2013

Lampshade to dirtshade

Over a year ago a previous roommate and I found a pair of white glass lampshades at le dump.  Now, maybe if we were re-doing a bathroom, or had pendant light fixtures to fancy up, they could have just been installed as intended and spent the rest of their days as plain old white glass lampshades, same old same old. Yawn.


What purpose could be better than filtering the light of a "soft pink" compact fluorescent bulb?  Why, supporting dirt of course!  Despite not having the ideal bottom configuration for dirt retention, they were put to use as planters.  I managed to watch at least one orchid wither away into nothingness while cradled inside this sleek environ, sigh. (Orchids continue to elude me.)  But I did not remain discouraged, when time came to split a mystery plant (Philodendron spp.?) that been hanging in the window I knew just what to use.


(Why, yes, those are free books peeping out from the bookshelf there. How kind of you to ask, alas I have not yet read them all.)  The Philodendron spp. (?) seem happy in their new homes away from the direct sun, and we now have a nice little symmetrical arrangement for the bookcase top.  Everybody wins!
Happy freestyle.

Tuesday, September 25, 2012

Owl together now

Owls seem to be quite fashionable as of late, and I’m in support of their popular resurgence. I appreciate their classical association with Athena, they are beautiful birds of prey, and they have curved faces that concentrate sound (much like a satellite dish concentrates a signal). Awesome.   
Given my enthusiasm you can imagine my double delight when I found this charming pair of owls with old tea light candles inside of them on the swap shelves at le dump.  After cleaning them up they looked like this:  

 I’m not a candles person, so how best to use these glass containers?  My natural inclination was to make them into planters, and with the leftover moss from a centerpiece I did just that.

It seemed fitting that owls should perch on the bookshelf, out of direct sunlight of course!  Maybe their steady gaze over the shoulder of the reading chair will help us attend to our studies...


Aside from owls, another awesome thing from a strictly freestyler point of view, is the start-of-September move time. Good weather, the end of summer sublets, and the start of new leases means Cambridge is on the move.  Labor Day weekend’s good weather this year also saw 'yard sales' springing up on front steps and sidewalks, such fun to peruse, even though I don’t aim to spend money on miscellany.  Stay tuned for the results from our walkabouts…. 

Thursday, July 19, 2012

A Marble-lous Idea

Ah the Groupon, it can take you to unexpected places- like a tiny artist's studio in Somerville where in just a few hours flames and fingers can transform borosilicate glass tubes into whatever you can imagine (given the limits of being an absolute novice in the arts of glasscraft).  In our case, I imagined a pendant, and boyfriend imagined a marble.
Not just any marble, but this shiny specimen!

Worthy of admiration.
     Boyfriend realized that such an item required a place to be displayed, and commissioned me to create one.  Off I went, on an intra-apartment freestyle hunt, looking for suitable free things that would be just the right size....  Something would have to be deep enough so that the marble could sit inside, small enough to fit on a work desk, and sturdy enough that it could be decorated and still cushion the marble.

Solution: The red cap from a generic pain reliever bottle. 

Supplies: scissors, blue felt, glue, and a red plastic bottle top.

I took the cap from a non-childproof pill bottle and decided to cover it with some blue felt left over from another project.  The edges of the bottle top are wavy, probably to help people grip the cap.  I thought that  the wavy soft edges of the display against the crisp line of the marble would be a nice contrast.  Because of the odd shape I had to glue the felt down in stages, and hold it with string while drying since it didn't want to sit flat against the cap.  

Sort of like watching paint dry....
I tried to get the folds evenly spaced around the edges, and in that I did not quite succeed.  There are some lumpy bits.  It is homemade from found parts, I hope he likes it anyway.

Ready for the big debut

This unique marble is now snug as a bug on its felted throne. 

Happy freestyling!