Showing posts with label greenery. Show all posts

Tuesday, August 4, 2020

Garden of freestyle delights - (another) scrap wood planter and a painting experiment

Upcycled Scrapwood into Painted Planter


When life gives you scrap wood, make scrap wood planters!  That has been my motto lately, and it has been fun to see what can be created out of a few leftovers by making as few cuts as possible.  The picture below is the bottom of the assembled planter while I was completing the last construction step -- drilling drainage holes into it. It's definitely made of leftover pieces, you can see someone else's pencil marks.

Bottom of scrap wood planter with drainage holes being drilled.


For this scrap wood planter I decided to try painting the outside with some really cheap poster paint.  The paint CLEARLY SAYS it is water-soluble, so I did not expect my paintings on the wood to last very long past the next rainstorm. But I was also curious about how much paint would sink into the wood and how long it might persist while living outside in the elements.

Here is the assembled planter before any painting.

Scrap wood planter and poster paint ready to use


I looked for some Art Deco inspiration, in the very loosest sense, and found a butterfly and a lotus - both of which seem like appropriate themes for garden art.  I have near-zero decorative painting skills, but this seemed like a good place to play around and try something new.

Painted Planter Results


I had 6 colors of the poster paint but didn't try to use them all, in this case simple was the goal.  

Below is the first side, painting inspired by an Art Deco jewelry piece I saw online.


Scrap wood planter painted with Art Deco butterfly motif

Below is the side that I painted with a lotus-inspired design. Van Gogh I am not, nor Monet.


Scrap wood planter painted with Art Deco lotus flower motif

Conclusion

Lucky for this scrap wood planter painting experiment there was a rain event the very same night that I painted this planter and planted it with some scallions. (Yes, those are scallions purchased from the grocery store for 99 cents per bunch that I replanted in the garden.) The photos below shows how much washed away in that first rain event, just hours after the paint had dried.
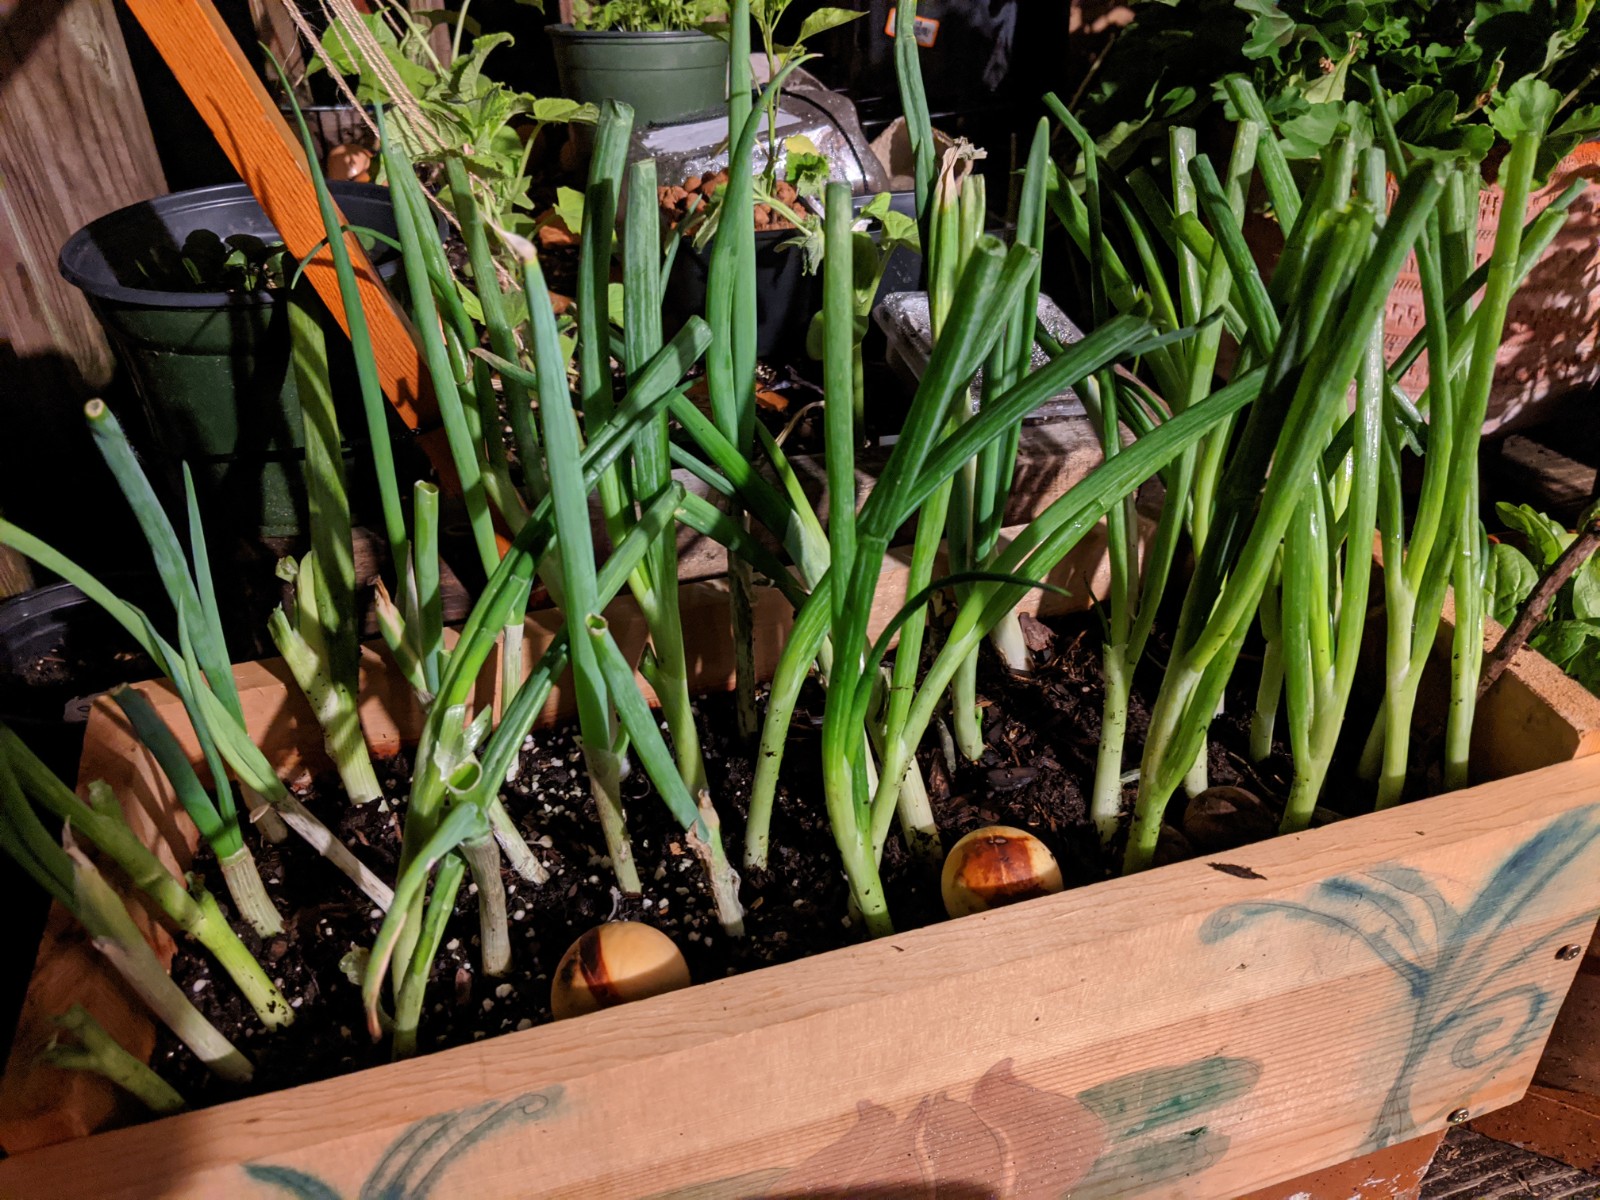
Scrap wood planter with scallions and faded Art Deco lotus flower motif


Since the paint fades so quickly I wonder if this could be a technique to use if someone wanted to quickly create a 'weathered' look along new wood (it would be someone who had poster paint, but not other traditional aging washes like nails soaked in vinegar).  You could maybe use a mix of white, gray, brown, and black paint applications to mimic varied textures, let it sink into the wood and dry, and then wash the wood.  I have no idea if that would look reasonable or like a decrepit art project from some long-ago children's art attempt. 

This was a fun project, and all for the cost of a few screws and some $2 bottles of poster paint.  

Happy freestyle-garden-ing!


Tuesday, July 21, 2020

Garden of freestyle delights - Scrap wood tomato planter

Garden of freestyle delights

When you see a pile of scrap wood...

Does your mind automatically start calculating how big of a rectangle-ish box you could make? 

Seeing how pieces could be cut up, fit together, drilled through, and screwed into to make yet another thing that can hold dirt?

Well my mind was VERY MUCH in that space this spring when I had the urge to setup a patio garden space and try my hand at growing cherry tomatoes again. It's probably been a decade, but there is never a bad time to return to vegetable gardening!

The wood

There was a pile of wood that was sitting abandoned for a while, which upon closer inspection turned out to be the remnants of a table. Some of the pieces had this lovely dappled silver pattern from the weathering.

Close-up image of weathered wood texture
Close-up of weathered wood


I have no idea if the wood was deliberately stained grey or if that was a reaction from being left outside. Either way, beautiful! 

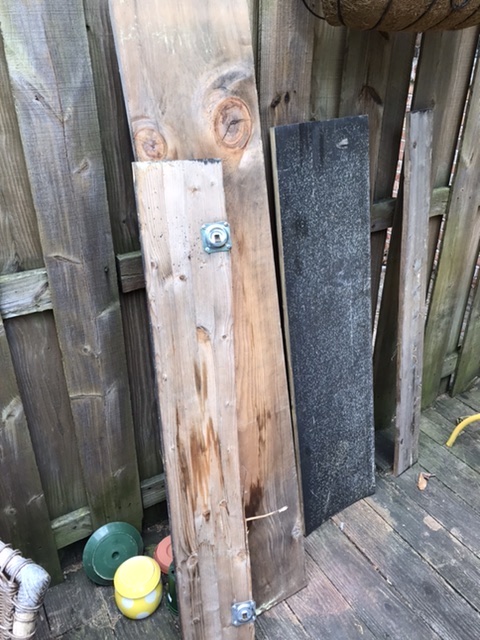
Once we got all the pieces to the workspace the design of the planter started to come together a bit more, but first I had to take some pieces apart.  You can see the metal attachment plates for table legs in the picture below.

Pieces of scrap wood from abandoned table
Scrap wood from abandoned table


Luckily I didn't have to try to pry these off with my bare hands, I had a few tools available at this point. The power drill was essential in deconstructing any unwanted parts and then building the planter with the L-brackets that I bought from the hardware store.


Supplies used to construct the scrap wood planter, saw, drill, brackets
Saw, drill, and L-brackets


The planter

It is much easier to hold pieces in the proper alignment and screw them together with two people, so I'm glad I had a friend to help with this job.  There aren't any pictures of the sawing wood or actually screwing the pieces together with L-brackets, but here is what the basic box looked like when it was done.


Rectangular planter made from scrap wood

In case you are wondering, there is a reason the back wood cross-piece is longer than the front. Aside from trying to minimize the amount of hand-sawing needed for this project I wanted extra space to attached a trellis at some future point since my plan was to grow cherry tomatoes.

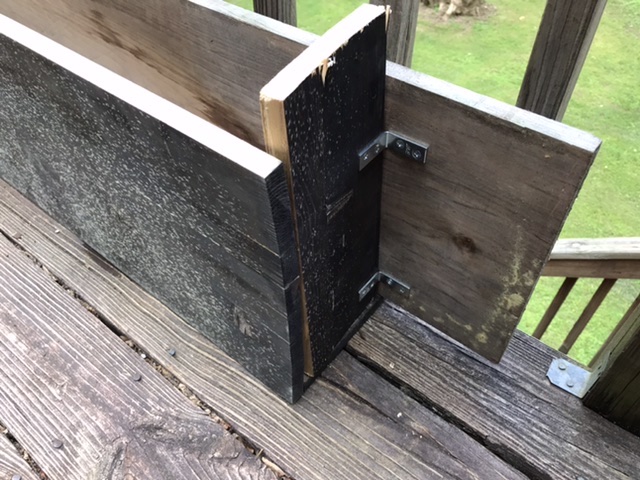
Below is a closeup of the end, you can see the L-brackets are on the outside here, because the inner space was simply too small to fit the drill.  You can also see that the front wood had bowed a bit, which is ok because this is a planter.

Scrap wood planter, short end with visible brackets
Planter end with visible L-brackets


From this top view you can see the L-brackets that were used on the inside of the planter box so that they wouldn't show from the font.  You can also see the drainage holes I drilled in the bottom using the largest available drill bit. Always always always consider the drainage!

Scrap wood planter from above with drainage holes visible
Planter from above with drainage holes visible


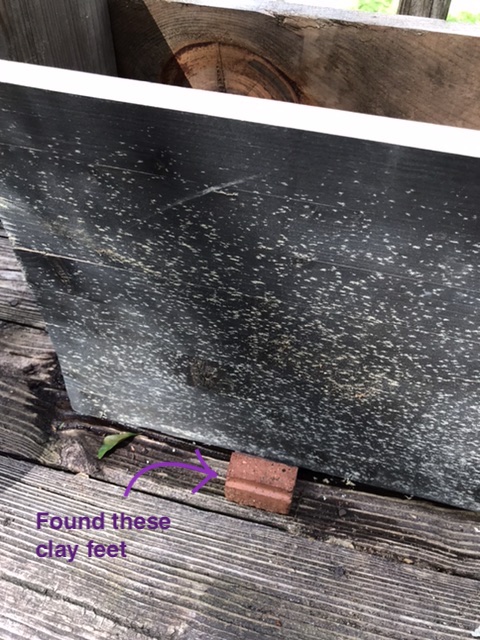
Part of thinking about drainage is looking at where your planter will be sitting. If a planter has drainage holes but is sitting on another surface that traps water then the situation can encourage mold or algae growth.  Similarly, a planter sitting on a wooden surface can trap moisture on top of the wood deck lead to unwanted effects.  So just like drainage, it is also important to consider ventilation and air flow.  In this case I proper up the planter a few inches on some ceramic feet that I had found in a give-away pile.


Scrap wood planter sitting on clay feet for elevation

There were only 3 ceramic feet so I had to space them carefully, but they held up to the weight just fine!  After getting the planter elevated and in the right position all that was left was to fill it with dirt and four tiny tomato seedlings.  For the cherry tomatoes I was limited to what was still available at the hardware store, and ultimately ended up with three 'supersweet 100 hybrid' strains and one 'black cherry tomato' strain.

Scrap wood planter with tomato seedlings


You'll notice in the above picture that there are peppers and rosemary plants attached to the railing above the cherry tomatoes.  I knew while building the tomato planter box that this garden arrangement would have to shift, and eventually I'd need to add a trellis or some sort of support for the tomatoes because I wanted to do string training.  An excellent description of why and how to do string training for tomatoes is available on this website.  Stay tuned for trellis and string-training updates in another post.


Conclusions

Rome wasn't built in a day, your garden doesn't have to be either.  In creating this freestyle garden the goal was to spend as little money (preferably no money) on large heavy objects like planters that won't be making the next move (whenever that happens).  This means keeping an eye out for free scrap wood, free ceramics whether large, medium, or small, and especially free plastic planters (way easier to carry than large pieces of wood).  See the potential!

Happy freestyling!

Tuesday, September 8, 2015

Summer plant giveaway, to anonymous receipients

Apparently part of growing plants successfully is wanting to give the offshoots away, at least for me.
I enjoy seeing things take root, go to a new home, and inspire someone to be happier and healthier in life with their new bit of greenery.  In that spirit here are some of the small plants I've given away this summer, all propagated from existing stock. Maybe this will inspire someone to try their hand at growing an easy houseplant, start with pothos or a Sansevieria and go from there.


 The pothos that keeps on giving.

Check out those roots after this cutting spent almost two months in nothing but a glass of water.
Impressive!


Giving away a sextet of succulents... sort of.
Left column from top to bottom: Sansevieria 1 & 2 (champion houseplant), bromeliad pup. Right column: aloe x2, some sort of succulent, other sort of succulent.  
Depending on how you count there are at least six different succulent plants here, so I stand by my alliteration. I put these plants out for anyone to take at an office - when I went back to check about 2 hours later they were gone. I think that means people need more green in their life, definitely in their offices.

Happy freestyling, and wherever you can, grow a garden.