Garden of freestyle delights
When you see a pile of scrap wood...
Does your mind automatically start calculating how big of a rectangle-ish box you could make?
Seeing how pieces could be cut up, fit together, drilled through, and screwed into to make yet another thing that can hold dirt?
Well my mind was VERY MUCH in that space this spring when I had the urge to setup a patio garden space and try my hand at growing cherry tomatoes again. It's probably been a decade, but there is never a bad time to return to vegetable gardening!
The wood
There was a pile of wood that was sitting abandoned for a while, which upon closer inspection turned out to be the remnants of a table. Some of the pieces had this lovely dappled silver pattern from the weathering.
 |
| Close-up of weathered wood |
I have no idea if the wood was deliberately stained grey or if that was a reaction from being left outside. Either way, beautiful!
Once we got all the pieces to the workspace the design of the planter started to come together a bit more, but first I had to take some pieces apart. You can see the metal attachment plates for table legs in the picture below.
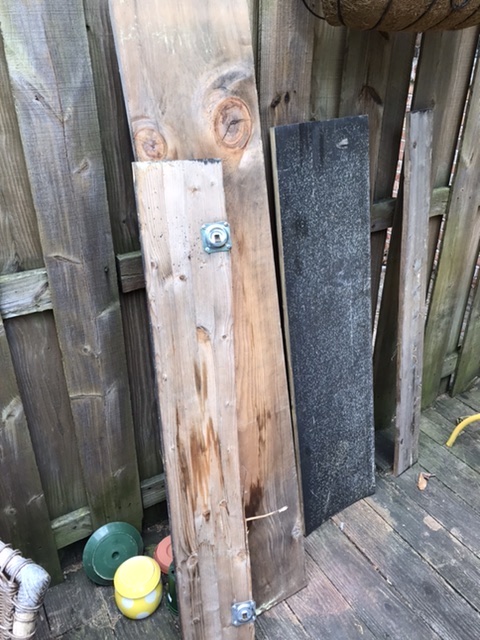 |
| Scrap wood from abandoned table |
Luckily I didn't have to try to pry these off with my bare hands, I had a few tools available at this point. The power drill was essential in deconstructing any unwanted parts and then building the planter with the L-brackets that I bought from the hardware store.
 |
| Saw, drill, and L-brackets |
The planter
It is much easier to hold pieces in the proper alignment and screw them together with two people, so I'm glad I had a friend to help with this job. There aren't any pictures of the sawing wood or actually screwing the pieces together with L-brackets, but here is what the basic box looked like when it was done.
 |
| Rectangular planter made from scrap wood |
In case you are wondering, there is a reason the back wood cross-piece is longer than the front. Aside from trying to minimize the amount of hand-sawing needed for this project I wanted extra space to attached a trellis at some future point since my plan was to grow cherry tomatoes.
Below is a closeup of the end, you can see the L-brackets are on the outside here, because the inner space was simply too small to fit the drill. You can also see that the front wood had bowed a bit, which is ok because this is a planter.
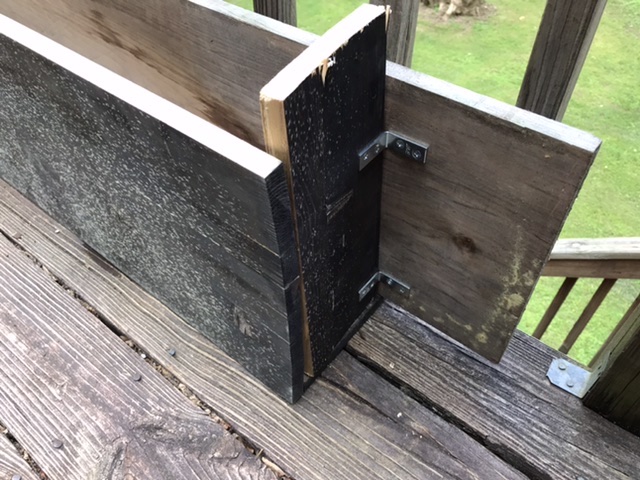 |
| Planter end with visible L-brackets |
From this top view you can see the L-brackets that were used on the inside of the planter box so that they wouldn't show from the font. You can also see the drainage holes I drilled in the bottom using the largest available drill bit. Always always always consider the drainage!
 |
| Planter from above with drainage holes visible |
Part of thinking about drainage is looking at where your planter will be sitting. If a planter has drainage holes but is sitting on another surface that traps water then the situation can encourage mold or algae growth. Similarly, a planter sitting on a wooden surface can trap moisture on top of the wood deck lead to unwanted effects. So just like drainage, it is also important to consider ventilation and air flow. In this case I proper up the planter a few inches on some ceramic feet that I had found in a give-away pile.
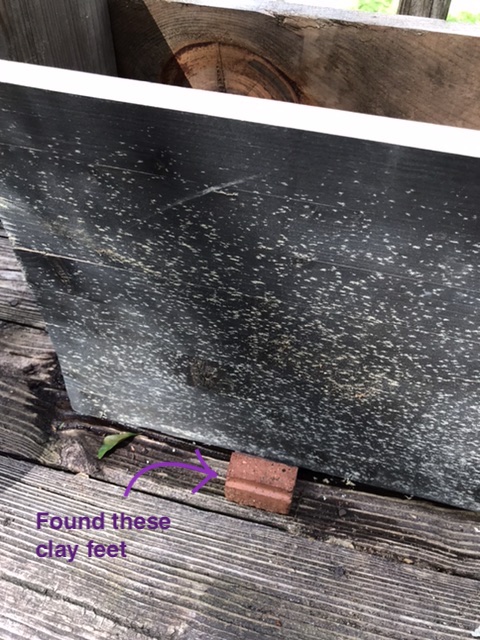 |
| Scrap wood planter sitting on clay feet for elevation |
There were only 3 ceramic feet so I had to space them carefully, but they held up to the weight just fine! After getting the planter elevated and in the right position all that was left was to fill it with dirt and four tiny tomato seedlings. For the cherry tomatoes I was limited to what was still available at the hardware store, and ultimately ended up with three 'supersweet 100 hybrid' strains and one 'black cherry tomato' strain.
 |
| Scrap wood planter with tomato seedlings |


